STEP #6- EDIT YOUR SCRIPT
You are almost done.
Now we are going to edit the script -
Your script toolbar should be open
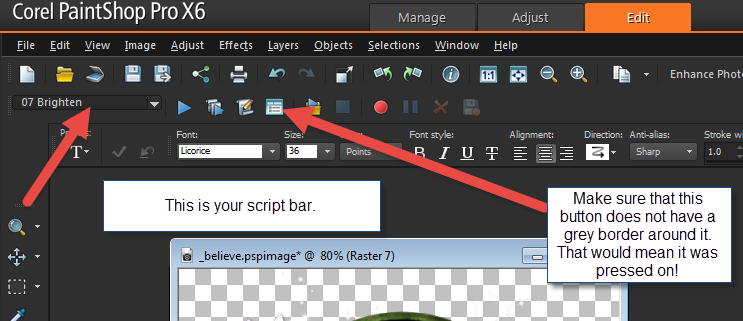
See where it has the word 07brighten - well that is the name of
one of the scripts that I have in this folder.
But we want to choose the drop down arrow and
choose the script we just saved.
Do you see why the tip of having _ before the script name could be helpful?
When you use the drop down arrow all the scripts you recorded will be at the top
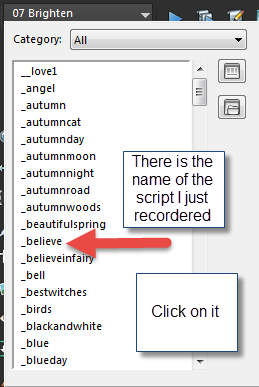
Click on the Edit button on the script toolbar
It looks like a paper and pencil - Click on that

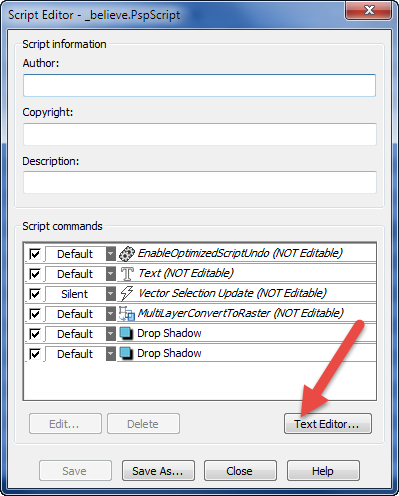
You will get this -
Now click on Text Editor
When you click on Text Editor - you will get this
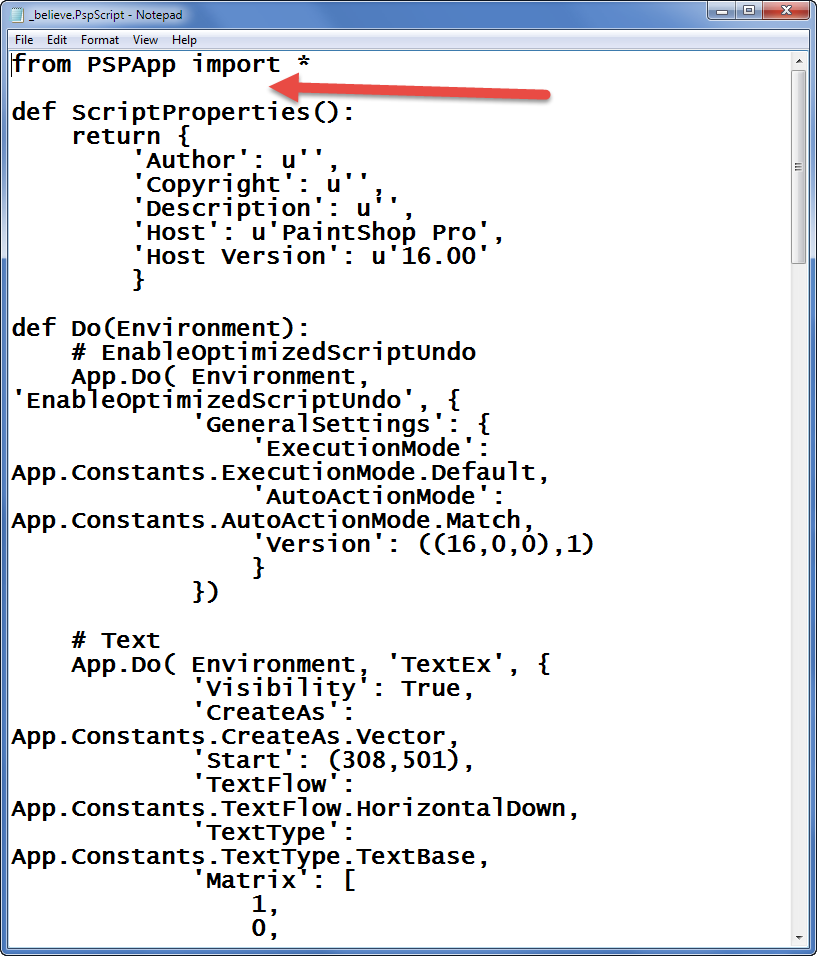
Remember when you saved the Add Text Script - the text file
This is where we are going to use it
Open the Text File -
You will see two lines
Copy that first line -
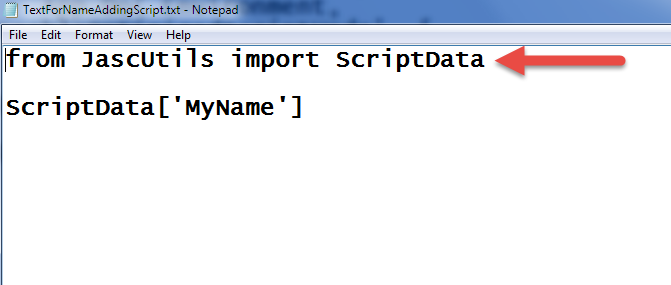
Go back to your script - and add it here -
Make sure that you have a return line in between
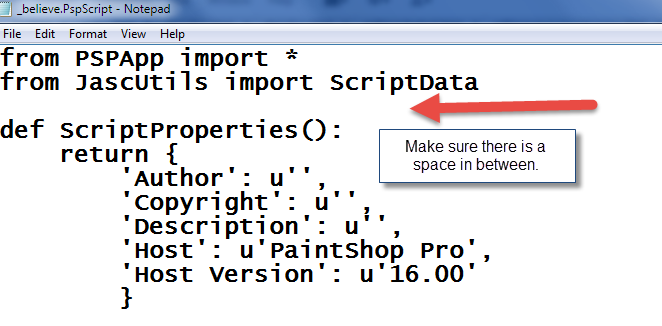
Back to your Text File and copy that second line

Now back to your script and scroll down until you see the name you added when
doing your script
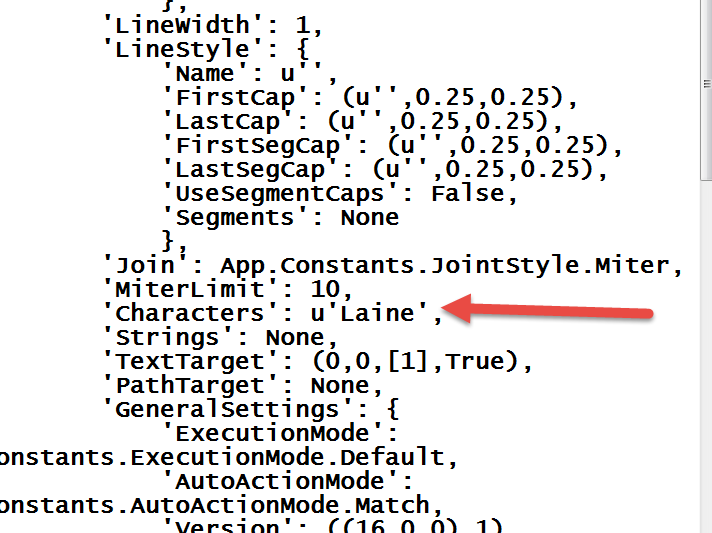
Highlight the name from the u

Now paste what you had copied from the text file
It should look like this

Almost through -
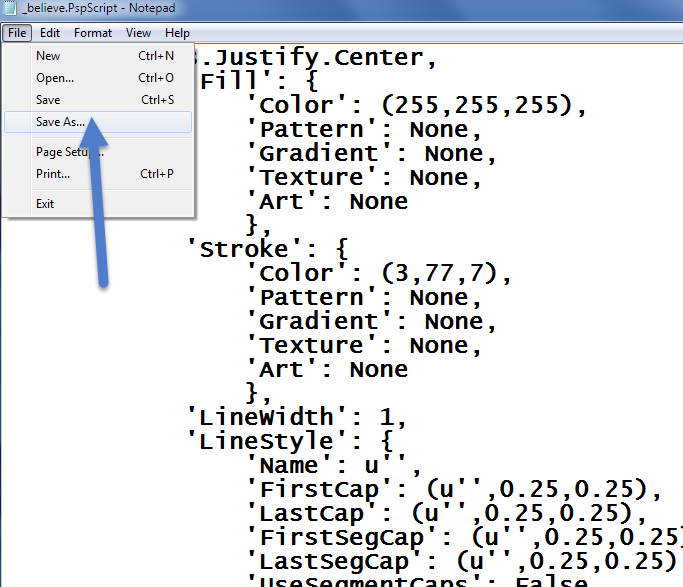
We need to save your new edited script
Go to File - Save as
Make sure that you are in the folder where your .pspimage and your script is
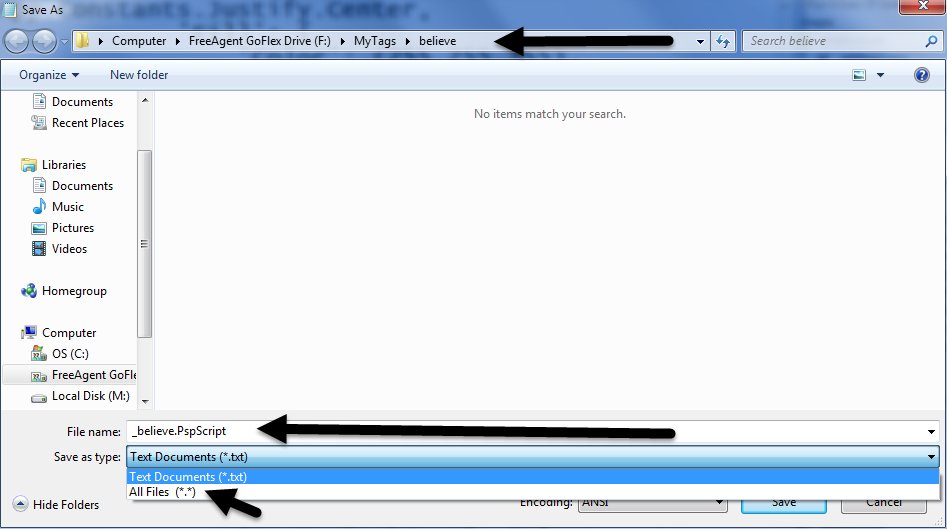
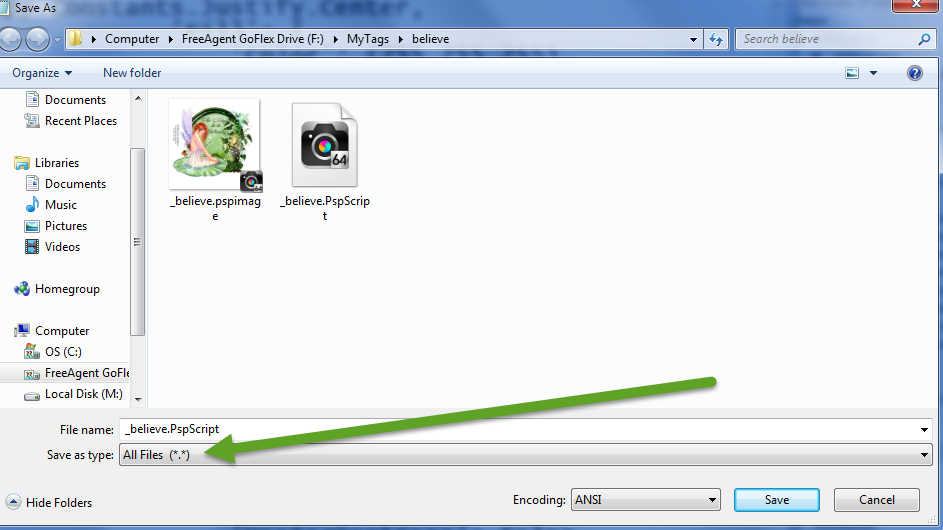
Make sure that you have clicked the down arrow at the Save As Type
Make sure it is on All Files
You will see the file name *.PspScript
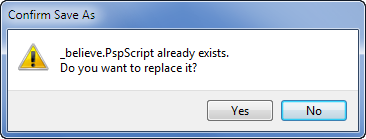
Now click on SAVE, you will get the Do you want to replace it?
If you get that, you have done it right-
Header Image ©Alex Prihodko
|